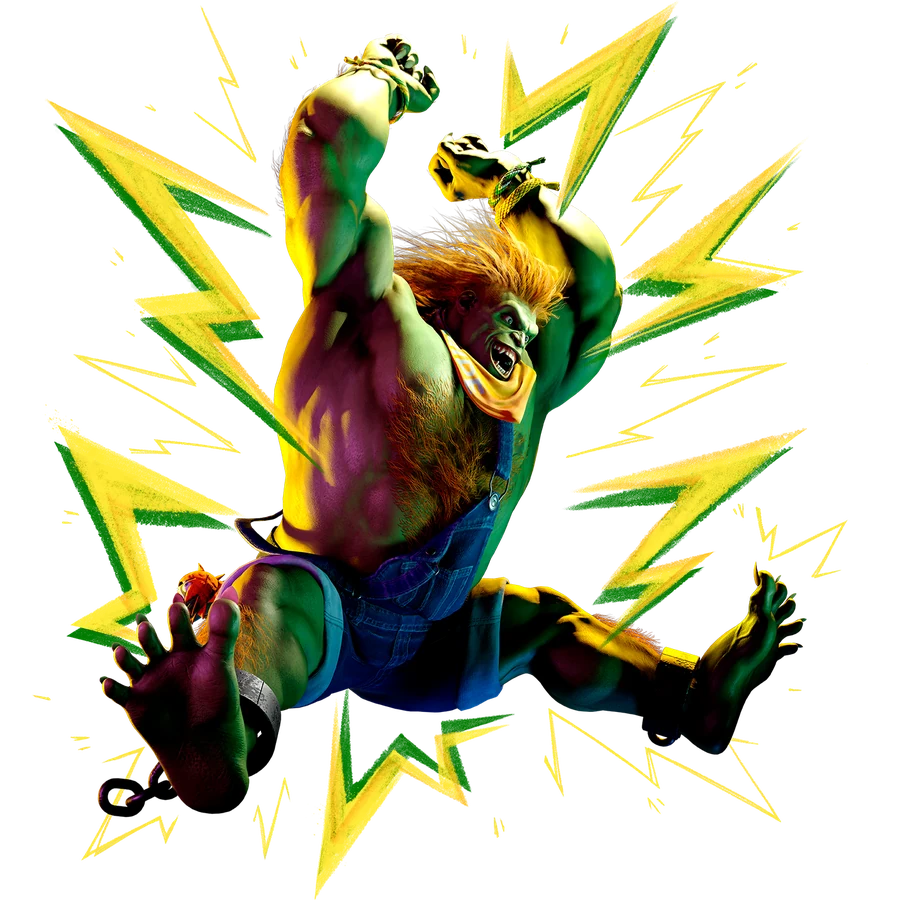
COMBO ROUTESBLANKA Combos & Okizeme
Practical routes organized by starter, resources, corner position, and knockdown.
YEAR 4 COMBO & OKIZEME GUIDEClassic-control routes are grouped by practical situation. Commands, frame values, and route order are preserved from the current Japanese source guide.
2026-08-31 updatedYear 4 / 2026-08-03 battle balance update
Move names use CAPCOM's official English Frame Data terminology. Route order and numerical values are shared with the Japanese guide.
Jump to a section (31)
CONTENTSESSENTIAL ROUTES01Notation
DR = Parry Drive Rush
CDR = Cancel Drive Rush
PC = Punish Counter
CH = Counter Hit
Electric Thunder = 214P
Rolling Attack = [4]6P
Vertical Rolling Attack = [2]8K
Backstep Rolling Attack = 63214K
Wild Hunt = 236K
Coward Crouch = 2PP
Wild Lift = P during Coward Crouch
Raid Jump = K during Coward Crouch
Blanka-chan Bomb = 22P
Key changes in the 2026-8-3 version
Held Electric Thunder
From the 4th hit onward, the held version branches into a dedicated follow-up. The follow-up changed from a strike to a projectile. The 8th hit's active duration changed from 2F to 3F. Making the opponent block it on wake-up leaves Blanka at +2F. This gives it more applications against strike-invincible SA1 moves.
4MK Wild Edge
Whiff recovery increased from 12F to 16F, and the hurtbox remains extended forward on whiff. It still leaves Blanka at +2F on block and +8F on hit.
st.MP
Startup changed from 10F to 9F.
st.MK
The foot hurtbox just before the move becomes active was improved.
6HP
A projectile-specific hurtbox was added.
st.HK: airborne Counter Hit
The launch duration was shortened. Some older DR > st.HP pickups now require DR > st.LK instead.
10 essential starter combos
1 Basic light-attack route
st.LK > cr.LP > Electric Thunder
st.LK starts in 4F. It is a basic option for interrupting pressure, punishing, and wake-up pressure.
2 low starter
cr.LK > cr.LP > Electric Thunder
Electric Thunder leaves approximately +39F on hit. Choose this ender for wake-up pressure.
3. Damage from light attacks
st.LK > st.LK > M Rolling Attack
M Rolling Attack prioritizes damage over the Electric Thunder ender. After light attacks, choose M Rolling Attack for damage or Electric Thunder for the resulting position and pressure.
4 4MK starter
4MK > st.MK > Electric Thunder
Alternative option
4MK > cr.MK > M Rolling Attack
4MK is +2F on block. Whiffing it carries more risk in Year 4.
5. Basic cr.MP route
cr.MP > M Rolling Attack
Alternatively:
cr.MP > Electric Thunder
M Rolling Attack prioritizes damage; Electric Thunder prioritizes wake-up pressure.
6. Main Drive Rush combo
cr.MP > CDR > st.HK > st.HP > Coward Crouch > Wild Lift > M Vertical Rolling Attack
This is a main route. The final move can also be replaced with Amazon River Run or cr.HK.
M Vertical Rolling Attack: the damage-focused option.
Amazon River Run: the option that prioritizes wake-up pressure.
7. Basic st.HK route
st.HK > cr.LP > L Vertical Rolling Attack
This uses st.HK's ability to force the opponent to stand.
8. Drive Rush overhead
DR > 6MP > st.HK > cr.LP > L Vertical Rolling Attack
Example for closing out a round
DR 6MP > st.HK > cr.LP > CDR > st.LK > st.MK > CDR > st.HK > st.HP > Wild Lift > M Rolling Attack > SA3
9 st.HK Punish Counter
st.HK PC > st.HP > Coward Crouch > Wild Lift > M Vertical Rolling Attack
If wake-up pressure is the priority:
> Amazon River Run
10. High-damage punish after blocking an invincible reversal
st.HK PC > st.HP > CDR > st.HK > st.HP > CDR > st.HK > st.HP > Coward Crouch > Wild Lift > M Rolling Attack > SA3
An option for maximizing a large punish opportunity.
6 HP Punish Counter
6HP PC > DR > st.HP > Coward Crouch > Wild Lift > Amazon River Run
After Amazon River Run hits an airborne opponent, the advantage is approximately +37F. This can lead to a meaty M Wild Hunt, for example.
H Rolling Attack Punish Counter
H Rolling Attack PC > DR > Amazon River Run
corner
H Rolling Attack PC > DR > st.HP > Coward Crouch > Wild Lift > SA3
Clean Drive Impact hit
DI clean hit > Surprise Forward Hop to cross behind > st.HP > Coward Crouch > Wild Lift > Amazon River Run
A side-switch option when your back is to the corner.
Corner Basic combo
Meterless combo into bomb setup
st.HP > Coward Crouch > Wild Lift > Blanka-chan Bomb
Continue into wake-up pressure using the doll.
corner / Damage-focused route
st.HP > Coward Crouch > Wild Lift > Electric Thunder > H Vertical Rolling Attack
Corner: bomb setup and damage
st.HP > Coward Crouch > Wild Lift > Electric Thunder > OD Backstep Rolling Attack > Blanka-chan Bomb
Drive Impact wall splat
DI wall splat > st.HP > held Electric Thunder > H Vertical Rolling Attack
DI crumple > st.HP > held Electric Thunder > H Vertical Rolling Attack > approximately +42F > safe jump
Key Frame Advantage by Ender
Electric Thunder > +39F
OD Electric Thunder > +40F
L Vertical Rolling Attack > +35F
M Vertical Rolling Attack > +42F
H Vertical Rolling Attack > +42F
H Rolling Attack > +30F
OD Rolling Attack > +57F
OD Wild Hunt > +64F
Wild Lift > +55F
forward throw > +30F
back throw > +27F
SA3 > +50F
1 Electric Thunder +39F
Electric Thunder > +39F
forward dash > +20F
two forward dashes > +1F
From there:
> st.LK meaty
2 Electric Thunder > Surprise Forward Hop
Electric Thunder > Surprise Forward Hop > +11F
From there:
Use an immediate meaty st.HP, or walk forward slightly and throw.
3. Corner Electric Thunder into whiffed 4MK
Electric Thunder (+39F) > whiff 4MK > approximately +13F > late-active meaty 4MK
Approximate values
hit: +13F
block: +7F
On hit, st.HP combos afterward.
4. Important Year 4 setup: corner meaty held Electric Thunder
Electric Thunder knockdown > meaty held Electric Thunder
On block, Blanka is +2F.
The held portion is a projectile. It can cover some SA1 moves and armored options.
If you expect a Perfect Parry or an invincible reversal:
Whiff regular Electric Thunder to leave approximately +4F, then choose a throw, a delayed throw, or st.LK.
Mix holding and not holding the move, including options based on a read that the opponent will use an invincible reversal.
5 +42F safe jump
M Vertical Rolling Attack hits low in the air > +42F > immediate forward j.HK
Alternatively:
+42F situation > forward jump HK
A basic safe jump.
6 cr.HP PC > safe jump
cr.HP PC > two forward dashes > +42F > forward jump HK
This may cross up depending on spacing. Adjust with j.MK or another suitable jumping attack if needed.
7. Grounded Amazon River Run hit
Amazon River Run > +29F approximately
From there:
DR > 6MP
Aim to make the overhead meaty against both normal recovery and back recovery.
8. Airborne Amazon River Run hit
airborne hit > +35F
forward dash > +16F
Alternatively:
Surprise Forward Hop > +8F
Surprise Forward Hop: same-side/cross-up mix
An immediate hop crosses behind regardless of recovery choice.
With a 1F delay, normal recovery gives a cross-up and back recovery keeps you on the same side.
9 Wild Lift > L Vertical Rolling Attack
Wild Lift > L Vertical Rolling Attack > +38F
Surprise Forward Hop > approximately +11F > late-active meaty 4MK
Alternatively:
L Rolling Attack > +7F
10 Wild Lift > M Vertical Rolling Attack
Wild Lift > M Vertical Rolling Attack > +44F
two forward dashes > +6F
The spacing is wider, so continue pressure with a move that reaches, such as cr.LP.
After forward throw
forward throw > +30F
Surprise Forward Hop > +3F
A throw may not reach. Use st.LK or another suitable button for wake-up pressure.
Other options: DR cr.MK or DR 6MK.
forward throw PC > OD Wild Hunt
forward throw PC > OD Wild Hunt
This setup makes the command throw meaty. Regular L Wild Hunt loses to a 4F interrupt, so confirm the throw Punish Counter and use the OD version.
After OD Wild Hunt > approximately +64F
SA3 > +50F
M Rolling Attack > approximately +9F > late-active meaty 4MK
Approximate values
hit: +9F
block: +3F
Alternative option
DR > Surprise Forward Hop > 4MK meaty
Blanka-chan Bomb
Set a bomb with 22P.
After placing the doll, activate it by hitting it with one of Blanka's electrical attacks.
Activated with regular Electric Thunder
The doll travels horizontally.
Activated with OD Electric Thunder
The doll bounces 2 times.
Activated with SA1
The doll rushes through the air with multiple hits.
Important
Since March 2026, an activated doll disappears if Blanka himself is hit.
Be careful with older video setups where the doll keeps attacking after Blanka is hit; that behavior differs from the current version described here.
Basic routes into bomb setup
Meterless
st.HP > Coward Crouch > Wild Lift > Blanka-chan Bomb
After placing the doll: approximately +5F.
Corner carry using approximately 1 Drive bar
st.HP > Wild Lift > DR st.LK > Wild Lift > Blanka-chan Bomb
Carry the opponent toward the corner while setting the doll.
OD Backstep Rolling Attack into bomb setup
OD Backstep Rolling Attack > Blanka-chan Bomb > +5F
Alternative
st.HP > Wild Lift > OD Backstep Rolling Attack > Blanka-chan Bomb
> +10F approx.
Activate the doll with OD Electric Thunder
OD Electric Thunder > first hit of the activated doll
The sequence is a true blockstring up to this point.
Afterward
Use 6MK, or walk forward slightly into cr.MK.
Use these options for the following mix-up:
overhead / low
Apply the mix-up to open the opponent up.
OD bomb activation into an overhead combo
With the doll already placed:
Activate with OD Electric Thunder > 6MP > doll's 2nd hit > backdash > H Backstep Rolling Attack > held Electric Thunder > H Vertical Rolling Attack > +42F > safe jump
OD bomb activation into a low
Activate with OD Electric Thunder > walk forward into cr.MK > doll's 2nd hit > backdash > H Backstep Rolling Attack > held Electric Thunder > H Vertical Rolling Attack
Main mix-up after OD doll activation
6MP overhead
vs
cr.MK low
Bomb setplay loop
corner
cr.LK > st.LK > OD Electric Thunder + doll activation > two forward dashes > backward j.MP > Blanka-chan Bomb > H Vertical Rolling Attack
Continue pressure while setting another doll.
Target sequence
Place the doll > open the opponent up with doll pressure > combo > place another doll.
SA2 Lightning Beast
During SA2, rolling special moves do not require a charge.
On hit or block, they can also branch into Rolling Cannon.
Rolling Cannon can change direction in 8 directions.
Basic midscreen SA2 route
st.HP > SA2 > st.HP > L Vertical Rolling Attack > ↘Rolling Cannon > L Vertical Rolling Attack > delayed ↘Rolling Cannon
SA2: carry from midscreen to the corner
st.HP > SA2 > st.HP > M Vertical Rolling Attack > delayed ↘Rolling Cannon > back jump > low Aerial Rolling Attack > Rolling Cannon
This carries the opponent a long way toward the corner. Depending on the conditions, it can lead directly into doll wake-up pressure.
Corner SA2 route into doll setup
cr.MP > OD Electric Thunder > SA2 > held Electric Thunder > H Vertical Rolling Attack > ↘Rolling Cannon > Blanka-chan Bomb
Alternatively:
The M Vertical Rolling Attack version prioritizes damage.
Placing the doll can leave approximately +13F in some situations.
SA2 block pressure
st.HP > SA2 > st.HP > H Rolling Attack
The sequence is a true blockstring up to this point.
Afterward
↘Rolling Cannon > ↘Rolling Cannon
Some sequences remain a true blockstring through the 2nd Rolling Cannon and leave approximately +7F.
If you expect a Perfect Parry or an invincible anti-air, change direction with ↓Rolling Cannon.
Continuing pressure after a blocked attack
4MK
hit +8F
block +2F
4MK is strong on block, but its whiff risk increased in Year 4. Aim to make contact rather than leaving it out preemptively.
OD Electric Thunder
block +4F
Spend meter to keep your turn reliably.
cr.MK Drive Rush: answer to Drive Reversal
cr.MK > CDR > cr.LK > buffer 6+KKK
On a normal block: cr.LK > st.LK.
If the opponent uses Drive Reversal, Surprise Forward Hop comes out and avoids it.
An advanced option.
Invincible-Reversal Punishes
basic
st.HK PC > st.HP > Wild Lift > M Vertical Rolling Attack
With Drive meter available
st.HK PC > st.HP > CDRx2 > Wild Lift > M Rolling Attack > SA3
corner Option
st.HK PC > st.HP > OD Rolling Attack > H Vertical Rolling Attack > SA1
10 Practical Starter Routes
1.
st.LK > cr.LP > Electric Thunder
2.
4MK > st.MK > Electric Thunder
3.
cr.MP > M Rolling Attack / Electric Thunder
4.
cr.MP > CDR > st.HK > st.HP > Wild Lift > M Vertical Rolling Attack
5.
Combo > Electric Thunder +39F > two forward dashes > st.LK
6. +42F > forward j.HK safe jump
7. In the corner: Electric Thunder > meaty held Electric Thunder > +2F on block, with coverage against SA1.
8.
st.HP > Wild Lift > Blanka-chan Bomb
9. Place the doll > activate with OD Electric Thunder > 6MP / cr.MK
10. st.HP > SA2 > Rolling Cannon pressure
Current Game Plan
Make contact with light attacks or 4MK > Electric Thunder or a combo > carry to the corner > place Blanka-chan Bomb > activate with OD Electric Thunder > overhead / low / throw > combo > set another doll.
Notes for Older Guides
Use the following current-version replacements.
4MK has more whiff recovery and a larger hurtbox.
Held Electric Thunder gained projectile properties and a new follow-up.
Pickups after an airborne Counter Hit with st.HK have changed.
Surprise Forward Hop differs from its older behavior.
An activated Blanka-chan Bomb disappears when Blanka is hit.
References
Sources: official Street Fighter 6 battle adjustments; Ultimate Frame Data; Year 4 Blanka combo and setplay material; testing after the 2026-8-3 adjustments.
Combo and setplay conditions can vary with spacing, recovery choice, late-active hits, and position relative to the corner.
Recheck in Training Mode before using these routes in matches.
Frame advantage may vary with spacing, airborne hits, recovery options, and corner position. Verify important routes in Training Mode.