FIGHTER GUIDE IORI'S STRATEGY
JAMIE
ジェイミーUse this hub to reach practical combos, move data, matchup notes, frame data, and Iori's published videos for JAMIE.
- Health
- 10000
- Published data
- 4 sections
JAMIE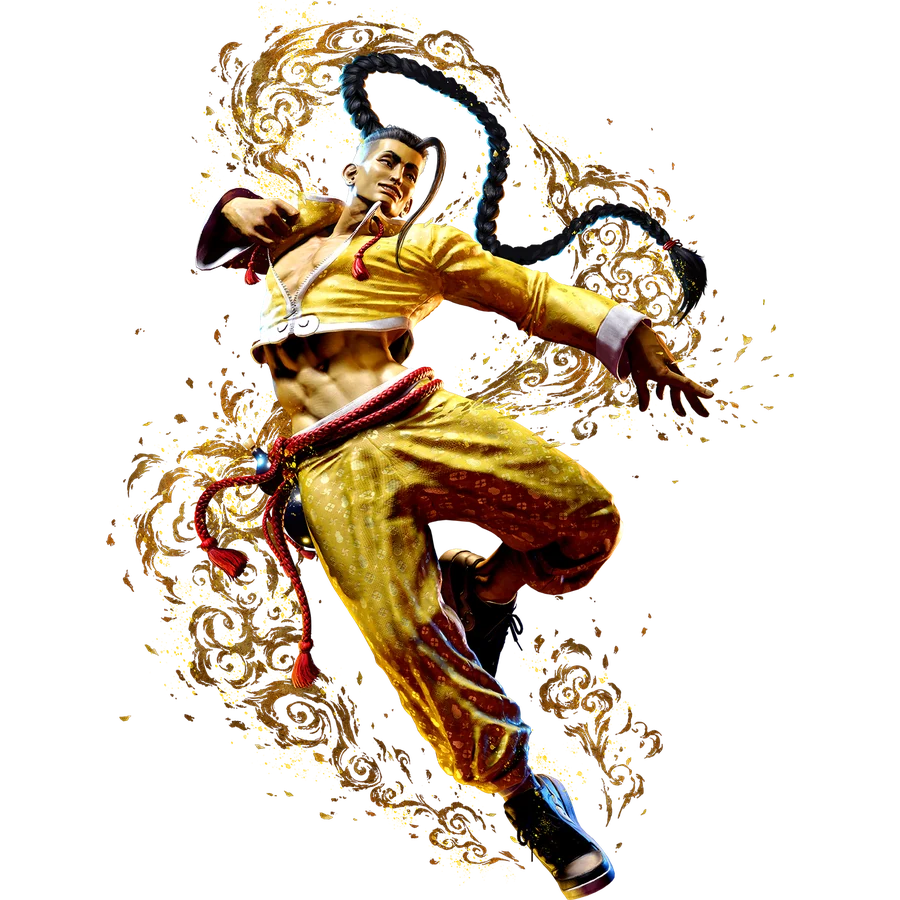
FRAME DATA
JAMIE Frame Data (SF6)
Official-reference startup, active frames, recovery, advantage, cancel properties, and damage.
Move names use CAPCOM's official English Frame Data terminology.
| Category | Move | Startup | Active | Recovery | On Hit | On Block | Cancel | Damage | Notes |
|---|---|---|---|---|---|---|---|---|---|
| Normal Attacks | Standing Light Punch | 5 | 5-6 | 7 | 5 | 0 | C | 300 | — |
| Normal Attacks | Standing Light Kick | 5 | 5-6 | 11 | 3 | -1 | C | 300 | Chain-cancelable. |
| Normal Attacks | Standing Medium Punch | 8 | 8-11 | 14 | 6 | 2 | 600 | — | |
| Normal Attacks | Standing Medium Kick | 9 | 9-11 | 17 | 2 | -3 | C | 600 | On whiff: 1F additional recovery. |
| Normal Attacks | Standing Heavy Punch | 5 | 5-145, 7, 12-14 | 20 | 1 | -3 | C | 900 | Cancelable through active frame 1. On airborne hit: launch knockdown. |
| Normal Attacks | Standing Heavy Kick | 15 | 15-17 | 21 | 3 | -5 | C | 800 | On Punish Counter: crumple. On airborne hit: launch knockdown. |
| Normal Attacks | Crouching Light Punch | 4 | 4-5 | 9 | 5 | -1 | C | 250 | Chain-cancelable. |
| Normal Attacks | Crouching Light Kick | 5 | 5-6 | 11 | 3 | -3 | 200 | Chain-cancelable. | |
| Normal Attacks | Crouching Medium Punch | 6 | 6-8 | 13 | 5 | -1 | C | 600 | On whiff: 2F additional recovery. |
| Normal Attacks | Crouching Medium Kick | 7 | 7-9 | 18 | -1 | -6 | C | 500 | — |
| Normal Attacks | Crouching Heavy Punch | 8 | 8-12 | 23 | 0 | -8 | C | 900 | Forces stand. Cancelable through active frame 2. |
| Normal Attacks | Crouching Heavy Kick | 9 | 9-15 / 9-10, 13-15 | 28 | D | -11 | 800 | On Punish Counter: longer knockdown and hard knockdown. On airborne hit: launch knockdown. Note: On block: 1F additional recovery. Note: The second hit is high only when the first hit is blocked. | |
| Normal Attacks | Jumping Light Punch | 5 | 5-13 | landing recovery 3 | 300 | Cross-up property. | |||
| Normal Attacks | Jumping Light Kick | 6 | 6-11 | landing recovery 3 | 300 | — | |||
| Normal Attacks | Jumping Medium Punch | 7 | 7-10 | landing recovery 3 | C | 700 | On airborne hit: launch knockdown. | ||
| Normal Attacks | Jumping Medium Kick | 7 | 7-12 | landing recovery 3 | 500 | Cross-up property. | |||
| Normal Attacks | Jumping Heavy Punch | 10 | 10-15 | landing recovery 3 | 800 | Causes a slam knockdown on airborne hit. | |||
| Normal Attacks | Jumping Heavy Kick | 8 | 8-19 / 8-10, 16-19 | landing recovery 3 | 800 | On airborne hit: launch knockdown. | |||
| Unique Attacks | Tensei Kick | 9 | 9-11 | 22 | D | -8 | 600 | Jump-cancelable on hit only. | |
| Unique Attacks | Phantom Sway(2) | 12 | 12-14 | 43 | D | -28 | 500 | — | |
| Unique Attacks | Phantom Sway(3) | total 60 | 0 | At frame 56: Drink Level increases by 1. At Drink Level 3 or lower: restores 2500 Drive Gauge. At Drink Level 4: restores 10000 Drive Gauge. | |||||
| Unique Attacks | Falling Star Kick | 22 | 22-24 | 20 | 1 | -3 | 600 | — | |
| Unique Attacks | Hermit's Elbow | 18 | 18-21 | 20 | 1 | -3 | SA | 800 | — |
| Unique Attacks | Senei Kick | 16 | 16-18 | 20 | 3 | -3 | SA | 900 | — |
| Unique Attacks | Bitter Strikes(1) | 5 | 5-7 | 9 | 2 | -3 | C | 300 | Available at Drink Level 1 or higher. |
| Unique Attacks | Bitter Strikes(2) | 6 | 6-7 | 16 | -3 | -8 | 200 | Available at Drink Level 1 or higher. | |
| Unique Attacks | Bitter Strikes(3) | 8 | 8-10 | 21 | -1 | -10 | C | 500 | Drink Level 1 or more activateavailable Note: On block: 2F additional recovery. |
| Unique Attacks | Full Moon Kick(1) | 22 | 22-24 | 20 | 1 | -3 | 600 | — | |
| Unique Attacks | Full Moon Kick(2) | 15 | 15-24 / 15-17, 23-24 | 28 | D | -14 | 600 | Available at Drink Level 2 or higher. | |
| Unique Attacks | Full Moon Kick(3) | total 61 | 0 | Drink Level 2 or more activateavailable At frame 54: Drink Level increases by 1. At Drink Level 3 or lower: restores 5000 Drive Gauge. At Drink Level 4: restores 10000 Drive Gauge. | |||||
| Unique Attacks | Intoxicated Assault(1) | 18 | 18-21 | 21 | 1 | -3 | SA | 800 | Available at Drink Level 3 or higher. |
| Unique Attacks | Intoxicated Assault(2) | 21 | 21-24 | 20 | 1 | -11 | C | 600 | Available at Drink Level 3 or higher. |
| Unique Attacks | Intoxicated Assault(3) | 21 | 21-23 | 37 | D | -20 | 800 | Drink Level 3 or more activateavailablecauses wall splat at the corner | |
| Unique Attacks | Ransui Haze(1) | 16 | 16-19 | 19 | 3 | -3 | 900 | — | |
| Unique Attacks | Ransui Haze(2) | total 75 | 0 | Drink Level 4 activateavailable On whiff: Can follow upanimationduringattack input follow-upmove change 6-25F Ransui Haze1 Can follow up31-55F Ransui Haze2 Can follow up63-80F Ransui Haze3 Can follow up | |||||
| Unique Attacks | Ransui Haze(3rd hit / immediate) | 14 | 14-18 | 28 | D | -13 | C | 850 | Available at Drink Level 4. |
| Unique Attacks | Ransui Haze(3rd hit / delayed) | 4 | 4-28 / 4-5, 14-15, 27-28 | 27 | D | -9 | C | 1200 | Available at Drink Level 4. |
| Unique Attacks | Ransui Haze(3rd hit / longest possible delay) | total 52 | 0 | Drink Level 4 activateavailable Drive Gauge10000restore | |||||
| Special Moves | The Devil Inside | total 50 | 0 | At frame 49: Drink Level increases by 1. At Drink Level 4: restores 5000 Drive Gauge. Hold the button animationcontinue, charged Drink Level 1 charged, animation 97F Drink Level, Lv damage multiplier increase, move Drink Level damage multiplier Drink Level 0 90%Drink Level 1 95%Drink Level 2 100%Drink Level 3 105%Drink Level 4 110%Note: The Devil's Songduring Drink Level 4, damage multiplier 105% | |||||
| Special Moves | L Freeflow Strikes(1) | 13 | 13-14 | 24 | -1 | -6 | SA3 | 350 | — |
| Special Moves | [Drink level 4]L Freeflow Strikes(1) | 13 | 13-26 / 13-14, 24-26 | 19 | 1 | -3 | SA3 | 400 | Available at Drink Level 4. |
| Special Moves | M Freeflow Strikes(1) | 16 | 16-17 | 24 | -1 | -6 | SA3 | 400 | — |
| Special Moves | [Drink level 4]M Freeflow Strikes(1) | 16 | 16-29 / 16-17, 27-29 | 19 | 1 | -3 | SA3 | 500 | Available at Drink Level 4. |
| Special Moves | H Freeflow Strikes(1) | 19 | 19-20 | 24 | -1 | -6 | SA3 | 450 | — |
| Special Moves | [Drink level 4]H Freeflow Strikes(1) | 19 | 19-32 / 19-20, 30-32 | 19 | 1 | -3 | SA3 | 600 | Available at Drink Level 4. |
| Special Moves | OD Freeflow Strikes(1) | 13 | 13-14 | 24 | 1 | -3 | SA2 | 450 | — |
| Special Moves | [Drink level 4]OD Freeflow Strikes(1) | 13 | 16-26 / 16-17, 24-26 | 19 | 3 | -1 | SA2 | 600 | Available at Drink Level 4. |
| Special Moves | L Freeflow Strikes(2) | 13 | 13-14 | 28 | -3 | -13 | 350 | The follow-up is also available on whiff. | |
| Special Moves | M Freeflow Strikes(2) | 16 | 16-17 | 28 | -3 | -11 | 400 | The follow-up is also available on whiff. | |
| Special Moves | H Freeflow Strikes(2) | 19 | 19-20 | 28 | -3 | -9 | 450 | The follow-up is also available on whiff. | |
| Special Moves | [Drink level 4]Freeflow Strikes(2) | 15 | 15-23 / 15-16, 22-23 | 27 | -2 | -10 | 450 | Available at Drink Level 4. | |
| Special Moves | OD Freeflow Strikes(2) | 13 | 13-14 | 22 | -1 | -3 | 450 | The follow-up is also available on whiff. | |
| Special Moves | [Drink level 4]OD Freeflow Strikes(2) | 15 | 15-23 / 15-16, 22-23 | 22 | -1 | -3 | 500 | Available at Drink Level 4. | |
| Special Moves | L Freeflow Strikes(3) | 13 | 13-14 | 30 | D | -17 | SA3 | 550 | The follow-up is also available on whiff. |
| Special Moves | M Freeflow Strikes(3) | 16 | 16-17 | 30 | D | -15 | SA3 | 600 | The follow-up is also available on whiff. |
| Special Moves | H Freeflow Strikes(3) | 19 | 19-20 | 30 | D | -13 | SA3 | 650 | The follow-up is also available on whiff. |
| Special Moves | [Drink level 4]Freeflow Strikes(3) | 16 | 16-40 / 16-17, 22-23, 38-40 | 28 | D | -14 | SA3 | 750 | Available at Drink Level 4. |
| Special Moves | OD Freeflow Strikes(3) | 13 | 13-14 | 30 | D | -13 | SA2 | 750 | The follow-up is also available on whiff. |
| Special Moves | [Drink level 4]OD Freeflow Strikes(3) | 16 | 16-40 / 16-17, 22-23, 38-40 | 28 | D | -14 | SA2 | 700 | Available at Drink Level 4. |
| Special Moves | L Freeflow Kicks(2) | 14 | 14-15 | 32 | -7 | -15 | 250 | — | |
| Special Moves | M Freeflow Kicks(2) | 17 | 17-18 | 32 | -7 | -15 | 300 | — | |
| Special Moves | H Freeflow Kicks(2) | 20 | 20-21 | 32 | -7 | -15 | 300 | — | |
| Special Moves | OD Freeflow Kicks(2) | 14 | 14-15 | 32 | -7 | -15 | 350 | — | |
| Special Moves | L Freeflow Kicks(3) | 18 | 18-19 | 64 | D | -49 | 450 | At frame 55: Drink Level increases by 1. At Drink Level 3 or lower: restores 5000 Drive Gauge. At Drink Level 4: restores 10000 Drive Gauge. | |
| Special Moves | M Freeflow Kicks(3) | 21 | 21-22 | 64 | D | -49 | 500 | At frame 59: Drink Level increases by 1. At Drink Level 3 or lower: restores 5000 Drive Gauge. At Drink Level 4: restores 10000 Drive Gauge. | |
| Special Moves | H Freeflow Kicks(3) | 24 | 24-25 | 64 | D | -49 | 550 | At frame 62: Drink Level increases by 1. At Drink Level 3 or lower: restores 5000 Drive Gauge. At Drink Level 4: restores 10000 Drive Gauge. | |
| Special Moves | OD Freeflow Kicks(3) | 18 | 18-19 | 64 | D | -49 | 600 | At frame 56: Drink Level increases by 1. At Drink Level 3 or lower: restores 5000 Drive Gauge. At Drink Level 4: restores 10000 Drive Gauge. | |
| Special Moves | L Swagger Step | 17 | 17-25 | 17 | D | -6 | SA3 | 900 | — |
| Special Moves | M Swagger Step | 20 | 20-28 | 17 | D | -6 | SA3 | 1000 | — |
| Special Moves | H Swagger Step | 25 | 25-33 | 16 | D | -3 | SA3 | 1200 | — |
| Special Moves | OD Swagger Step | 20 | 20-28 | 15 | D | -1 | SA2 | 1100 | On Punish Counter: onlywall splat |
| Special Moves | L Arrow Kick | 5 | 5-50 / 5-14, 41-50 | 52 | D | -45 | 1000 | 1-12F airborne strike; Note: hit 2 onward first hit On hit: onlyfollow-up | |
| Special Moves | M Arrow Kick | 8 | 8-43 / 8-16, 39-43 | 51 | D | -43 | 1200 | 1-14F airborne strike; Note: hit 2 onward first hit On hit: onlyfollow-up | |
| Special Moves | H Arrow Kick | 10 | 10-57 / 10-18, 41-45, 54-57 | 51 | D | -43 | 1400 | 1-16F airborne strike; Note: hit 2 onward first hit On hit: onlyfollow-up | |
| Special Moves | OD Arrow Kick | 6 | 6-51 / 6-12, 37-38, 50-51 | 53 | D | -43 | 1500 | 1-9F fully invincible10-12F airborne strike; Note: hit 2 onward first hit On hit: onlyfollow-up | |
| Special Moves | L Luminous Dive Kick | 11 | 11-until landing11,14-until landing | landing recovery 13 | D | 1000 | Available at Drink Level 1 or higher. | ||
| Special Moves | M Luminous Dive Kick | 11 | 11-until landing11,14-until landing | landing recovery 13 | D | 1000 | Available at Drink Level 1 or higher. | ||
| Special Moves | H Luminous Dive Kick | 11 | 11-until landing11,14-until landing | landing recovery 13 | D | 1000 | Available at Drink Level 1 or higher. | ||
| Special Moves | OD Luminous Dive Kick | 11 | 11-until landing11,14-until landing | landing recovery 13 | D | 800 | Available at Drink Level 1 or higher. | ||
| Special Moves | L Bakkai | 18 | 18-43 / 18-19, 22-24, 29-30, 42-43 | 24 | D | -12 | SA3 | 1400 | Drink Level 2 or more activateavailable3-24F projectile invulnerablefinal hit only SA3/CA Cancelable |
| Special Moves | M Bakkai | 22 | 22-59 / 22-23, 25-26, 30-31, 37-38, 51-52, 58-59 | 31 | D | -16 | SA3 | 1600 | Drink Level 2 or more activateavailable4-26F projectile invulnerablefinal hit only SA3/CA Cancelable |
| Special Moves | H Bakkai | 25 | 25-92 / 25-27, 34-35, 42-43, 50-51, 65-66, 74-75, 91-92 | 32 | D | -17 | SA3 | 1800 | Drink Level 2 or more activateavailable5-33F projectile invulnerablefinal hit only SA3/CA Cancelable |
| Special Moves | OD Bakkai | 18 | 18-100 / 18-23, 27-28, 37-38, 42-43, 51-52, 60-61, 74-75, 87-88, 93-94, 99-100 | 59 | D | -43 | SA2 | 2000 | 3-28F projectile invulnerablehit 7 only SA3/CA Cancelable |
| Special Moves | Tenshin | 8 | 8-9 | 52 | 8 | 0 | Drink Level 3 or more activateavailable Note: Combo hit 3 onward | ||
| Special Moves | OD Tenshin | 8 | 8-9 | 52 | D | 650 | Drink Level 3 or more activateavailable On hit: crumple Classic controls On Punish Counter: Damage (784) Modern controlswhen On Punish Counter: Damage (627) | ||
| Special Moves | Swagger Hermit Punch | 19 | 19-21 | 39 | D | -23 | SA3 | 900 | Available at Drink Level 4. |
| Special Moves | OD Swagger Hermit Punch | 19 | 19-21 | 39 | D | -23 | SA2 | 1000 | Available at Drink Level 4. |
| Super Arts | SA1 Breakin' | 8 | 8-133 / 8-16, 23-27, 34-35, 43-44, 52-53, 60-61, 68-69, 75-76, 106-107, 117-118, 125-126, 132-133 | 74※107 | D | -60※-93 | 2200※1850 | 1-12 strike/throw invulnerable Minimum damage scaling 30%Counter Hit/ Counter Hit values do not change Note: animationduring, down input change, Drink Level 1. | |
| Super Arts | SA2 The Devil's Song | total 6 | 0 | activateafter, when Drink Level 4 (, damage multiplier 105%) effectwhen 900F Drink Level 4when activate Drive Gauge30000restore | |||||
| Super Arts | SA3 Getsuga Saiho | 10 | 10-28 / 10-12, 26-28 | 42 | D | -27 | 2600 | 1-12F fully invincible Minimum damage scaling 50%Counter Hit/ Counter Hit values do not changehard knockdown Note: Applies only when canceled into a special move. | |
| Super Arts | CA Getsuga Saiho | 10 | 10-28 / 10-12, 26-28 | 42 | D | -27 | 4500 | 1-12F fully invincible Minimum damage scaling 50%Counter Hit/ Counter Hit values do not changehard knockdown Note: Applies only when canceled into a special move. | |
| Normal Throws | Back Shaver | 5 | 5-7 | 23 | D | 1200 | On Punish Counter: properties change; Damage2040; SA Gauge4000increase; hard knockdown Note: animationduring Hold the button change, Drink Level 1. | ||
| Normal Throws | Wheel Punch | 5 | 5-7 | 23 | D | 1200 | On Punish Counter: properties change; Damage2040; SA Gauge4000increase; hard knockdown | ||
| Common System | Forward Dash | total 19 | 0 | — | |||||
| Common System | Backward Dash | total 23 | 0 | 1-15F throw invulnerable | |||||
| Common System | Drive Impact: Vainglory Strike | 26 | 26-27 | 35 | D | -3 | 800 | 1-27F armor (2) Counter Hit, ー ー after hit properties change; hitcrumple; duringhit; SA Gauge3000increase | |
| Common System | Drive Reversal (while blocking): Leg Sweep | 20 | 20-22 | 26 | D | -6 | 500 | Recoverable damage 1-22F fully invincible On hit: recovery 5F increase | |
| Common System | Drive Reversal (while recovering): Leg Sweep | 18 | 18-20 | 26 | D | -6 | 500 | Recoverable damage 1-20F fully invincible On hit: recovery 5F increase | |
| Common System | Drive Parry | 1 | [※2] 1-12 | 33 | ※1 | 0 | Note: 1 animation 4F Drive Rush Note: 2 Hold the button active frames recovery block only Punish Counter state throughout the move. | ||
| Common System | Perfect Parry (strike) | 1 | 1 | 0 | opponent attack input input, input ー, ー attack (/overheadattack ←, lowattack ↙), Drive Gauge 3000increase recoveryend 5F fully invincible (continue) Perfect Parry, animationend through Counter Hit | ||||
| Common System | Perfect Parry (projectile) | 1 | 10 | 0 | input ー, ー attack Perfect Parry, animationend through Counter Hit | ||||
| Common System | Parry Drive Rush | total 45 | ※ | 0 | 10F Note: animation9F attack 24F | ||||
| Common System | Cancel Drive Rush | total 46 | ※ | 0 | 9F Note: animation10F attack 25F |
Referenced: 2026-08-27Official Street Fighter 6 Frame Data ↗