① Jump-in
j.HK > st.MP > cr.MP > M Spinning Bird Kick ↳ +34 ↳ forward dash, +15 ↳ Walk-up throw, walk forward into st.MP, or shimmy
Start charging down immediately after pressing st.MP.
FIGHTER GUIDE IORI'S STRATEGY
Use this hub to reach practical combos, move data, matchup notes, frame data, and Iori's published videos for CHUN-LI.
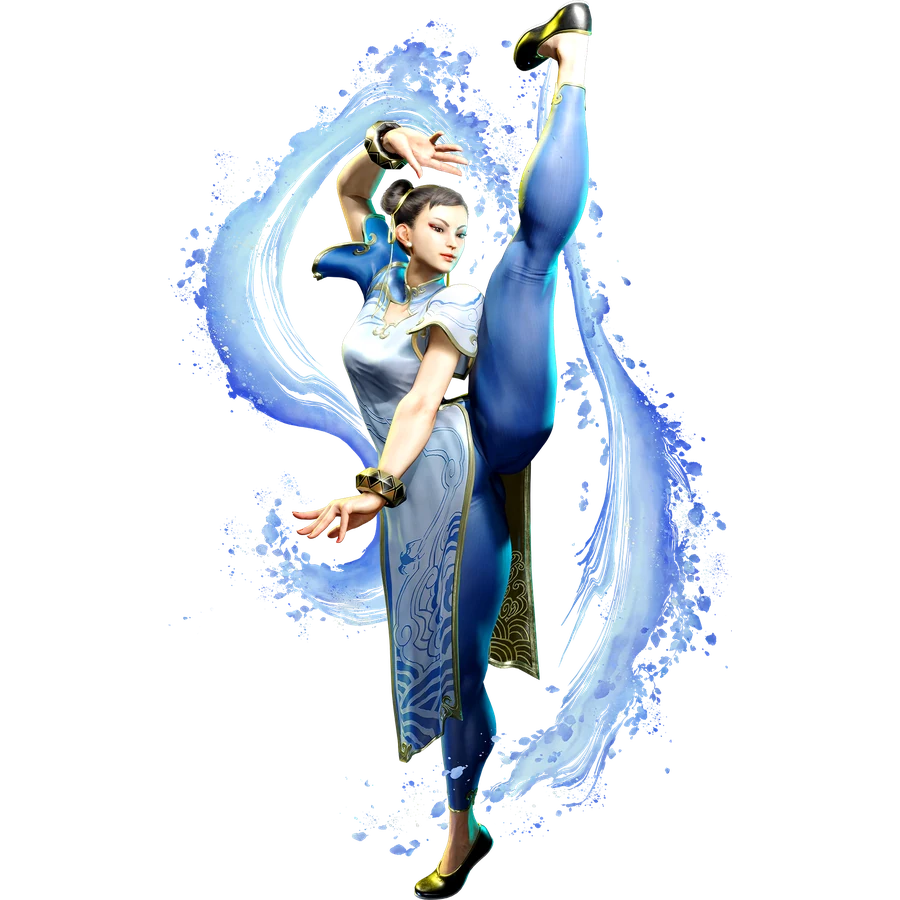
Practical routes organized by starter, resources, corner position, and knockdown.
Classic-control routes are grouped by practical situation. Commands, frame values, and route order are preserved from the current Japanese source guide.
Move names use CAPCOM's official English Frame Data terminology. Route order and numerical values are shared with the Japanese guide.
j.HK > st.MP > cr.MP > M Spinning Bird Kick ↳ +34 ↳ forward dash, +15 ↳ Walk-up throw, walk forward into st.MP, or shimmy
Start charging down immediately after pressing st.MP.
stable route
st.MP > cr.MP > M Spinning Bird Kick ↳ 2160 ↳ +34 ↳ forward dash, +15 ↳ Walk-up throw, walk forward into st.MP, or shimmy
damage
st.MP > cr.MP > H Spinning Bird Kick ↳ 2320 ↳ grounded hit +33 ↳ forward dash, +14 ↳ Walk-up throw, walk forward into st.MP, or shimmy
H Spinning Bird Kick will not connect if canceled too late. Start with M Spinning Bird Kick.
cr.LK > cr.LP > L Spinning Bird Kick ↳ 1296 ↳ Very tight charge timing ↳ L Spinning Bird Kick grounded hit +33 ↳ forward dash, +14 ↳ Walk-up throw, walk forward into st.MP, or shimmy
point-blank
st.LP > st.MP > cr.MP > M Spinning Bird Kick ↳ 2160 ↳ +34 ↳ forward dash, +15 ↳ Walk-up throw, walk forward into st.MP, or shimmy
st.LP > st.MP works only at point-blank range.
When you do not have charge
st.LP CH > Swift Thrust > M Hundred Lightning Kicks ↳ 1468 ↳ An alternative when Spinning Bird Kick is not charged
easy / stable route
cr.MK > Cancel Drive Rush > st.MP > Hakkei > Serenity Stream / Forward Strike > M Spinning Bird Kick ↳ 2139 ↳ +34 ↳ forward dash, +15 ↳ Walk-up throw, walk forward into st.MP, or shimmy
SA Gauge gain
cr.MK > Cancel Drive Rush > Hakkei > Serenity Stream / Tenku Kick > Yoso Kick > Soaring Eagle Punches ↳ 2031 ↳ High SA Gauge gain ↳ Knockdown advantage varies with the height of the airborne follow-up. ↳ If the route leaves +46, it allows a corner safe jump.
st.HP PC > Serenity Stream / Senpu Kick > H Spinning Bird Kick ↳ 2880 ↳ H Spinning Bird Kick +33 ↳ forward dash, +14 ↳ throw or shimmy
st.HP PC > Serenity Stream / Senpu Kick > H Spinning Bird Kick ↳ 2880 ↳ +33 ↳ forward dash, +14 ↳ Walk-up throw, walk forward into st.MP, or shimmy
Higher-damage extensions are possible, but start with this reliable meterless route.
This takes priority over learning a Drive Reversal punish for Chun-Li, so it occupies that slot in the starter list.
Raw Drive Rush > Water Lotus Fist > cr.MP > M Spinning Bird Kick ↳ 2360 ↳ overhead starter ↳ +34 ↳ forward dash, +15 ↳ Walk-up throw, walk forward into st.MP, or shimmy
DI wall splat > Hakkei > H Hundred Lightning Kicks > H Tensho Kicks ↳ Reliable damage ↳ Frame advantage varies with the height at which H Tensho Kicks connects. ↳ Continue into corner okizeme.
Prioritize SA Gauge gain and setplay
DI wall splat > Yokusen Kick > Serenity Stream / Tenku Kick > Yoso Kick x2 > Soaring Eagle Punches ↳ Frame advantage varies with airborne follow-up height. ↳ A result of +45–46 allows a safe jump.
DI PC > cr.HP > Serenity Stream / Tenku Kick > Yoso Kick x2 > j.HP on the way down > forward dash ↳ 2700 ↳ Can switch sides
easy route
DI PC > Falling Crane > L Spinning Bird Kick ↳ 2299 ↳ Prioritizes positioning
With your back fully against the corner
DI PC > Falling Crane > L Hundred Lightning Kicks > H Tensho Kicks ↳ 2880 ↳ Switches sides ↳ Prioritizes escaping the corner
Advanced option
DI PC > cr.HP > Serenity Stream / Tenku Kick > early Yoso Kick x2 > j.HP on the way down > forward dash
↳ Dash beneath the opponent to switch sides.
cr.HP > Serenity Stream / Forward Strike > M Spinning Bird Kick ↳ 2360 ↳ +34 ↳ forward dash, +15
Spinning Bird Kick does not require charge when canceled from a stance follow-up.
st.MP > cr.MP > OD Spinning Bird Kick > L Spinning Bird Kick ↳ 2539 ↳ corner carry / Okizeme focus
st.MP > cr.MP > OD Spinning Bird Kick > H Tensho Kicks ↳ 2680 ↳ Damage-focused route
st.MP > cr.MP > OD Spinning Bird Kick > L Hundred Lightning Kicks > H Tensho Kicks ↳ 3120
SA3
st.MP > cr.MP > OD Spinning Bird Kick > L Hundred Lightning Kicks > SA3 ↳ 4800
st.MP > cr.MP > OD Kikoken > cr.MK > M Spinning Bird Kick ↳ 2910 ↳ +34 ↳ corner Setplay
M Hazanshu PC > cr.MP > M Spinning Bird Kick ↳ 2340 ↳ Starter for going through a projectile ↳ +34
H Hazanshu PC > cr.MK > M Spinning Bird Kick ↳ 2680 ↳ Starter for going through a projectile ↳ +34
Hazanshu has heavy starter scaling. Avoid excessive extensions unless they will finish the round.
OD Hazanshu PC > H Tensho Kicks ↳ 2400
Alternatively:
OD Hazanshu PC > L Spinning Bird Kick ↳ 2239 ↳ Okizeme focus
On the way up from a neutral or forward jump > L Aerial Hundred Lightning Kicks PC > st.LP > st.MP > cr.MP > M Spinning Bird Kick ↳ 2340 ↳ On a throw read ↳ +34
Serenity Stream / Lotus Fist > M Spinning Bird Kick ↳ 2100
Meter-spending option
Serenity Stream / Lotus Fist > Cancel Drive Rushst.MP > Hakkei > Serenity Stream / Tenku Kick > Yoso Kickx2 > Soaring Eagle Punches ↳ 2941 ↳ overhead starter
Serenity Stream / Orchid Palm > Cancel Drive Rushst.MP > Hakkei > Serenity Stream / Forward Strike > M Spinning Bird Kick ↳ 2461 ↳ HP frame trap ↳ +34
st.HK on airborne hit > Serenity Stream / Senpu Kick > H Tensho Kicks ↳ 2380 ↳ Relatively difficult ↳ Adjust Senpu Kick's timing to the hit height.
Hakkei > H Hundred Lightning Kicks > SA1 ↳ 3160 ↳ Also works at midscreen
st.LP > st.LP > OD Hundred Lightning Kicks > SA2 > forward jump cancel > low-altitude j.MP > land > Yoso Kick x2 on the way up > Soaring Eagle Punches ↳ 2660
Follow-up after a standalone SA2
SA2 > forward jump cancel > low-altitude j.MP > land > Yoso Kick x2 on the way up > Soaring Eagle Punches ↳ 2700
Add SA1 ↳ 3210
SA2 > j.MP > land > H Hundred Lightning Kicks > H Tensho Kicks ↳ 3160
Hakkei > L Hazanshu > SA3
OD Hazanshu PC > SA3 ↳ 4640
+34
forward dash ↳ +15
Walk-up throw ↳ Manually time it to catch wake-up.
Walk forward into st.MP ↳ Meaty strike
Walk forward, then walk back for a shimmy.
+33
forward dash ↳ +14
Walk-up throw
Walk forward into st.MP
Walk forward, then walk back for a shimmy.
Alternative option
Parry Drive Rush > Water Lotus Fist
↳ active-frame meaty ↳ hit +8 ↳ block +5
On hit: cr.MP or cr.MK > M Spinning Bird Kick
+30
forward dash ↳ +11
Walk-up throw Walk forward into st.MP Walk forward, then back for a shimmy
+37
On an anti-air hit, frame advantage may increase depending on height.
Parry Drive Rush
st.MP Throw Yokusen Kick Wait and watch
Alternative setplay
forward dash ↳ +18
Parry Drive Rush > st.MP ↳ active-frame meaty ↳ hit +13 ↳ block +8
+34
Whiff cr.MP ↳ +11
Hakkei ↳ active-frame meaty ↳ hit +10 ↳ block +4
Alternative option
Whiff st.LP ↳ +21
walk back ↳ shimmy
Whiff st.LK ↳ +4
throw st.MP
+35
Serenity Stream / Lotus Fist ↳ Lines up with wake-up ↳ Overhead ↳ 2 hits
Low option
Serenity Stream > leave stance immediately > cr.LK
On a parry read
Serenity Stream > leave stance > wait > throw
Air combo > Soaring Eagle Punches > j.HP ender at a high position
↳ +46
Immediate forward jump > j.HK ↳ Safe against 5F reversals
Alternative option
forward jump > Yoso Kick > cr.LK ↳ Low attack after landing
If the airborne follow-up height leaves +45 instead
Immediate forward jump
j.HK ↳ Safe against 6F reversals ↳ Loses to 5F invincible reversals
Yoso Kick > j.HK ↳ overhead
Land and block ↳ Covers 5F invincible reversals ↳ Also accounts for Perfect Parry
+11
Chun-Li does not have a throw loop.
Immediate cr.HP from your current position ↳ Meaty strike
Walk forward slightly, then wait. ↳ Watch for parry or an invincible reversal. ↳ Throw when appropriate.
Walk-up throw ↳ An immediate attempt is not meaty. ↳ A throw attempt from an even situation
From long range: L Kikoken > walk forward
As the opponent blocks Kikoken:
Throw ↳ Adjust timing manually.
st.MP ↳ strike
Enter throw range, then walk back > cr.MP ↳ Shimmy
Swift Thrust ↳ Vary the timing against Perfect Parry attempts.
L Kikoken > Parry Drive Rush
cr.LK ↳ low
throw ↳ throw
Yokusen Kick ↳ Catch a throw-tech attempt.
Water Lotus Fist ↳ overhead
block +1
st.LP ↳ frame trap
On CH ↳ +7 ↳ cr.MK combos afterward.
block +5
Hakkei ↳ 3F gap ↳ Frame trap
From Hakkei ↳ Approximately a 2F gap
From cr.HP ↳ Approximately a 1F gap
After Orchid Palm
Cancel Drive Rush ↳ Damage
H Kikoken ↳ Reset the situation.
st.MP > st.LP
Drive Rush st.MP > Hakkei
Hakkei or cr.HP > Serenity Stream / Orchid Palm
Corner M Spinning Bird Kick > whiff cr.MP > Hakkei
Walk forward > walk back > cr.MP
Yokusen Kick
Low-altitude L Hundred Lightning Kicks
After a corner Spinning Bird Kick: whiff st.LP > walk back
st.MP meaty
Hakkei on a later active frame
cr.HP meaty
Tensho Kicks
cr.MP
cr.MK
Water Lotus Fist on a later active frame
H Tensho Kicks ender > Parry Drive Rush > wait
After forward throw > walk forward slightly, then wait
At +45, use the safe-jump setup but land and block.
L Kikoken > vary the timing with Swift Thrust
L Kikoken > go straight for a throw
Safe jump > throw after landing
Enter stance > leave stance > throw
+34
M Spinning Bird Kick
↳ Forward dash leaves +15. ↳ Walk-up throw ↳ st.MP ↳ Shimmy
+33
L or H Spinning Bird Kick Grounded hit
↳ Forward dash leaves +14. ↳ Walk-up throw ↳ st.MP ↳ Shimmy
+30
L Spinning Bird Kick airborne hit
↳ forward dash, +11
+37
H Tensho Kicks grounded hit
↳ Parry Drive Rush Okizeme ↳ forward dash, +18
+18
H Tensho Kicks > forward dash
Parry Drive Rush st.MP ↳ Late-active-frame meaty ↳ +13 on hit ↳ +8 on block
+35
Corner H Tensho Kicks on airborne hit
↳ Serenity Stream / Lotus Fist ↳ overhead meaty
+46
Air combo ending with j.HP at a high position
↳ 5F safe jump
+45
Air combo
↳ Safe against 6F reversals ↳ Loses to 5F invincible reversals
+11
Corner forward throw
↳ No throw loop ↳ cr.HP meaty ↳ Wait and watch ↳ Throw from an even situation
+11
Corner M Spinning Bird Kick > whiff cr.MP
Hakkei ↳ active-frame meaty ↳ hit +10 ↳ block +4
+5
Drive Rush st.MP on block
↳ Hakkei frame trap
+1
st.MP block
↳ st.LP frame trap
STEP 1
st.MP > cr.MP > M Spinning Bird Kick
cr.LK > cr.LP > L Spinning Bird Kick
STEP 2
M Spinning Bird Kick > forward dash, +15
Walk-up throw st.MP Shimmy
STEP 3
cr.MK > Cancel Drive Rush > st.MP > Hakkei > Serenity Stream / Forward Strike > M Spinning Bird Kick
STEP 4
cr.HP > Serenity Stream / Forward Strike > M Spinning Bird Kick
STEP 5
H Tensho Kicks > Parry Drive Rush
st.MP Throw Yokusen Kick Wait and watch
STEP 6
Corner M Spinning Bird Kick > whiff cr.MP > Hakkei
STEP 7
Corner H Tensho Kicks on airborne hit > Serenity Stream / Lotus Fist
STEP 8
DI wall splat > Hakkei > H Hundred Lightning Kicks > H Tensho Kicks
STEP 9
Serenity Stream / Tenku Kick > Yoso Kick > Soaring Eagle Punches
STEP 10
+46 safe jump
Learn how this differs from the +45 setup that is safe against 6F reversals.
STEP 11
SA2 > forward jump cancel > low-altitude j.MP > Yoso Kick x2 > Soaring Eagle Punches
STEP 12
Corner OD Spinning Bird Kick combos SA3 Side-switch combos
Based on the changes made on 2026-08-03.
The combos and setplay mainly follow the Chun-Li guide updated on 2026-08-17.
Pay particular attention to:
• How Spinning Bird Kick connects • The height at which Tensho Kicks catches the opponent • Air-combo height • The difference between +45 and +46 • Whether the route reaches the corner
These factors change the resulting frame advantage.
safe jump
+46 ↳ 5F safe jump
+45 ↳ Safe against 6F reversals ↳ Loses to 5F invincible reversals
Do not confuse these two setups.
• CAPCOM balance update, 2026-08-03
• Kakuburo (fighting game blog): Chun-Li combo guide, updated 2026-08-17
• Kakuburo (fighting game blog): Chun-Li setplay guide, updated 2026-08-17
• STREET FIGHTER 6 Wiki: Chun-Li combos and okizeme
• Goziline: Chun-Li guide
• Input st.MP with the direction held neutral. Holding forward or back produces Swift Thrust instead.
• Spinning Bird Kick requires 30F of charge. Start holding down before the normal attack.
• Canceling a Serenity Stream follow-up into Spinning Bird Kick does not require charge.
• Air-combo hit height can change knockdown advantage by 1F or more.
• H Tensho Kicks has different knockdown advantage on grounded and airborne hits.
• Chun-Li cannot perform a true throw loop after a corner forward throw.
Street Fighter 6 Chun-Li For Classic controls As of 2026-08-31
Frame advantage may vary with spacing, airborne hits, recovery options, and corner position. Verify important routes in Training Mode.